


Restoration Speedy 1975 Civic
-
whiterabbit06

- Member

- Posts: 25
- Joined: January 5th, 2015, 3:08 pm
- Province/State:
Re: My '75 Civic Restomod
I haven't tried it but I thought I'd suggest it. I know a long time ago when I was into rc cars there was a spray paint that had flakes in it and when it dried the flakes lined up and made a mirror finish.
Why oh why didn't I take the blue pill?
-
lordame
- Owner

- Posts: 11
- Joined: May 11th, 2015, 3:00 am
- Province/State:
Re: My '75 Civic Restomod
Interesting resto.
I have the same engine at home.
i look forward to see how do you proceed
I have the same engine at home.
i look forward to see how do you proceed
-
Speedy

- Member
- Posts: 23
- Joined: February 27th, 2015, 9:51 am
- Province/State:
My '75 Civic Restomod
LET THERE BE COLOR!
Sorry for the late update guys, I've been super busy with a lot of different things going on in my life. Finally got some color on the car and it is back in my care safe at home. My 3-stage pearl orange is on and I'm ready to start getting this baby put together and looking like the real deal! Real quick I wanted to share what I've been doing while the car's been away. So I mentioned that I am planning on putting a custom hitch behind my car to tow small stuff like dirt bikes and jet-skis and what not. I figured I should up my welding experience before doing any actual welding on the car's frame to fit the new engine. I took the opportunity of having the car away for paint to work on a trailer I had gotten for free from my uncle. I started out with this:
Here I had already chopped up the front end and installed bars to raise the suspension and keep the wheels from hitting the deck after I widen it.
All the metal I had lying around my house, so that was all free as well! I widened the deck out to 5x8 instead of 4x8 to fit quads sideways.
Got the wood for the deck from work for free and the primer was some good old super heavy duty stuff we had lying around. Free as well ") here we're test fitting the quad before final paint. My brother doesn't make the best faces for the camera haha
here we're test fitting the quad before final paint. My brother doesn't make the best faces for the camera haha
After that was final paint! Same as the primer, just different color and in an enamel version. This pic doesn't show the complete finished product with lights, chain, and tie-down rings but you guys get the point Just thought it'd be nice to share my accomplishment. Took me about 2 weeks to do and is probably one of the only truly finished projects we have around the house including the house itself haha so now when I'm done with the car you'll all be able to spot me riding out to the hills or to the lake 8)
Anyways, back to the car! It's sitting nice and pretty in my garage currently covered in moving blankets to protect the paint while I weld up the frame. I started a week ago on the modifications.
Marked and chopped out a section to make clearance for the alternator pulley
And here's part of the patch panel. Decided to re-use some of that old Honda steel. This is the only piece I have pictures of. I've removed the driver's side engine support and finished closing off the pictured patch panel along with starting to chop out the underside of the frame to make more clearance. Will get more pics soon to show off, and hopefully I won't take 2 months to update haha
Anyways, back to the car! It's sitting nice and pretty in my garage currently covered in moving blankets to protect the paint while I weld up the frame. I started a week ago on the modifications.
1975 Honda Civic Si Turbo
EW4 swap, 4x100/rear disc conversion
Not your grandma's car
EW4 swap, 4x100/rear disc conversion
Not your grandma's car
-
bob78cvcc
- LSD

- Posts: 1686
- Joined: May 2nd, 2008, 9:22 pm
- Province/State: NJ
Re: My '75 Civic Restomod
Very nice looking color choice.
Cool looking trailer. Nice work!
Cool looking trailer. Nice work!
78 Civic CVCC
It's just a Civic thing
It's just a Civic thing
-
rmilano31
- Short Shifter

- Posts: 136
- Joined: May 10th, 2006, 4:04 pm

- Province/State: Colorado
- Hometown: Falcon
- Model: 1973 Hatchback
Re: My '75 Civic Restomod
Car looks great. I live in Gilroy and would like to check it out sometime. Where did you get it painted?
Ramon
Ramon
-
Speedy
- Member
- Posts: 23
- Joined: February 27th, 2015, 9:51 am
- Province/State:
Re: My '75 Civic Restomod
Hey Ramon, I love showing off my cars so I may just have to meet up with you sometime!rmilano31 wrote:Car looks great. I live in Gilroy and would like to check it out sometime. Where did you get it painted?
Ramon
So currently I'm working on putting the car together and making it look like an actual car. Ran out of argon for my TIG, and my MIG is too powerful for this sheet metal, so welding the frame and doing motor mounts is on hold until I get that bottle filled up. Along with the fact that my engine hoist is being loaned out for a few days makes me pretty stuck there. Unless somebody would kindly volunteer to hold my engine in place while I take measurments for mounts? :mrgreen: The last two patch panels are made and in place on the frame, just the inside corners of them need to be welded up, will post pictures later. So while I'm waiting on my welder I'm putting on everything from handles to mirrors and hatch lift supports and lights and the whole shabang. Everything's getting all polished and repainted and purdied up before it goes on the car. Hopefully if I get enough done soon I'll post a pic of my progress on the body. Also getting my Koosjer stripe made up now in matte black! Very exciting. Definitely going to post pics of that one when it's installed.
1975 Honda Civic Si Turbo
EW4 swap, 4x100/rear disc conversion
Not your grandma's car
EW4 swap, 4x100/rear disc conversion
Not your grandma's car
-
Blue-Civic-Hybrid

- Projects

- Posts: 128
- Joined: June 30th, 2015, 12:35 pm
- Province/State: San Diego, CA.
- Hometown: San Diego
- Model: 1975 Wagon CVCC
Re: My '75 Civic Restomod
Amazing thread and restomod! That trailer you built looks fantastic! I can't wait to see more of your updates!
-
Darqnez
- Owner
- Posts: 11
- Joined: June 2nd, 2010, 12:02 pm
- Province/State: Berkeley Area
Re: My '75 Civic Restomod
Great Build! Your inspiring me to sit down and post up the 5 years of pictures I have for my own. Car looks great now your at the point where you have to put it together without scratching it! GREEN TAPE is cheaper than paint repair, use liberally. :D
-
Speedy
- Member
- Posts: 23
- Joined: February 27th, 2015, 9:51 am
- Province/State:
My '75 Civic Restomod
Well post them! I wanna see! I could use some extra motivation, this is a lot of work to do and I'm trying to accomplish it in under 2 years instead of 5 haha and yes, I'm not afraid to pull out the green tape, especially after this paint job.Darqnez wrote:Great Build! Your inspiring me to sit down and post up the 5 years of pictures I have for my own. Car looks great now your at the point where you have to put it together without scratching it! GREEN TAPE is cheaper than paint repair, use liberally.
So another big update for everyone interested! And like I figured, it took me a month or two to get around to updating :lol Well I borrowed a buffing wheel from my uncle, and I must say it works wonders! Everything is coming out like brand spankin' new!
- image26.jpg (112.06 KiB) Viewed 4237 times
- image29.jpg (206.44 KiB) Viewed 4237 times
Most of my time has been dedicated to cleaning up and installing all my old parts and lights and what not, along with getting all the glass and pretty new seals in! Got the whole set from civicgarage.com except for the rear hatch glass seal. All my parts cars' seals are shrunken back and have gaps between the straight sections and the corners. Now I'm just hoping that EvoCivic pulls through and gets those rear glass seals made! Anyone who is vaguely interested should check out his thread on it and order one even if they don't need it. We need numbers and money to get this done and have access to a full set of seals for our cars when needed!
Here's EvoCivic's thread: http://1stgencivic.com/forum/viewtopic.php?t=19275
Now you have no excuse to go check it out!
And while you're checking stuff out, check this out!
- image28.jpg (230.92 KiB) Viewed 4237 times
- image32.jpg (182.77 KiB) Viewed 4237 times
I'm in the middle of doing the 4x100 conv. and rear disc swap, which is why the car is on jack stands. It's nice having an uncle with his own machine shop. He machines my parts, I help him redo his trellis and fit some doors, and both of us end up very happy! Just like the rest of the car, everything gets blasted and painted.
- image27.jpg (161.35 KiB) Viewed 4237 times
- image31.jpg (125.6 KiB) Viewed 4237 times
Back to the original thread!
Last thing I have for this update is probably my favorite...
- image30.jpg (152.06 KiB) Viewed 4237 times
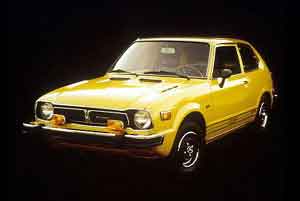
I've been waiting to make these babies for a few months now. I REALLY have to thank koosjer for all his work on getting these reproduced and available, they look wonderful. Sadly there are some imperfections in my paint and they'll need to be buffed out before I can have these installed. So for now they hang on my wall next to the dresser I have loaded with a bunch of other parts that are waiting to be installed on the car last (yes those are NOS parts on the dresser, so sue me for my earlier comment :roll: haha!). The body shop said they want me to put the entire car together, get it driving the way I want it, and then give it to them so they can buff it out, get rid of the nipples in my clearcoat that are keeping me from installing my stripes, and fix up anything they missed when they painted it. So I'm hauling butt trying to get this thing going. I've got a couple sidejobs I need to finish up to raise a little bit of extra money for this project, then I'll go on to making custom motor mounts, fitting the engine, and getting her rolling on her own power after a fresh rebuild top to bottom on engine and transmission. Lots of cool stuff, I'm really happy this project is moving right along like I want it to. I can't wait to feel the difference in driving this baby compared to my dad's bone-stock canary yellow '79 CVCC :burnout
1975 Honda Civic Si Turbo
EW4 swap, 4x100/rear disc conversion
Not your grandma's car
EW4 swap, 4x100/rear disc conversion
Not your grandma's car
-
Speedy
- Member
- Posts: 23
- Joined: February 27th, 2015, 9:51 am
- Province/State:
Re: My '75 Civic Restomod
So I worked on getting the engine fitted today and it looks so good sitting in there. Makes me even more excited to "git'r done!" and get this baby rolling on her own power!
There are tons of areas I had to check when setting up the engine for mounting. The things I had to do:
Got it at the perfect angle angle and height to where the oil pan isn't too low and doesn't hit the sway bars
The intake manifold clears the firewall by about 3\4 of an inch which is a bit close IMO
The block deck is level left to right
The transmission and crank pulley fit great where I cut out the frame
Alternator pulley is far enough from the frame to not hit
I have 3 inches of space between the crossmember and engine, so that's going to be tight to fit an exhaust pipe through there
The differential and the hubs line up nicely so the axles stay straight and don't have unnecessary stress
The shift mechanism on the transmission stays under the steering subframe and clear of any obstacles so you don't have to jimmy up a rig to shift the darn thing
And obviously there are a ton of other things to worry about too, but these are the main ones. Just ordered bushings, so when those get here I can start setting up motor mounts and after that comes the rebuild and paint! Speaking of which, I am having the hardest time figuring out how I want to paint this bad boy. I was thinking orange valve cover, natural aluminum block/head and orange upper intake manifold? I would appreciate some input, I want this engine to really POP in the engine bay (aesthetically that is, I don't need any backfiring coming from a freshly rebuilt and tuned engine ), which is why I painted the bay black and left the engine to stand out when I get to it.
- image33.jpg (217.63 KiB) Viewed 4445 times
- image34.jpg (202.17 KiB) Viewed 4445 times
Got it at the perfect angle angle and height to where the oil pan isn't too low and doesn't hit the sway bars
The intake manifold clears the firewall by about 3\4 of an inch which is a bit close IMO
The block deck is level left to right
The transmission and crank pulley fit great where I cut out the frame
Alternator pulley is far enough from the frame to not hit
I have 3 inches of space between the crossmember and engine, so that's going to be tight to fit an exhaust pipe through there
The differential and the hubs line up nicely so the axles stay straight and don't have unnecessary stress
The shift mechanism on the transmission stays under the steering subframe and clear of any obstacles so you don't have to jimmy up a rig to shift the darn thing
And obviously there are a ton of other things to worry about too, but these are the main ones. Just ordered bushings, so when those get here I can start setting up motor mounts and after that comes the rebuild and paint! Speaking of which, I am having the hardest time figuring out how I want to paint this bad boy. I was thinking orange valve cover, natural aluminum block/head and orange upper intake manifold? I would appreciate some input, I want this engine to really POP in the engine bay (aesthetically that is, I don't need any backfiring coming from a freshly rebuilt and tuned engine
1975 Honda Civic Si Turbo
EW4 swap, 4x100/rear disc conversion
Not your grandma's car
EW4 swap, 4x100/rear disc conversion
Not your grandma's car
