
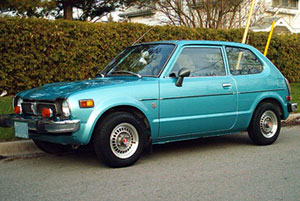


Project Steph's 1978 Honda Civic 1200
-
Steph
- Projects

- Posts: 3201
- Joined: August 14th, 2008, 2:02 am

- Province/State: South Australia
- Hometown: Adelaide
- Model: 1978 Hatchback
Re: Steph's 1978 Honda Civic 1200
Hey, thanks for the comments! I sometimes wonder if anybody is still reading, much less locals! Inspections will be welcome once it's finished.
I just finished the headlight bezels. I really wanted them polished so I would be able to see how they look on the new Anzo 7' LED headlights when they arrive.They still need to be chrome plated.
I just finished the headlight bezels. I really wanted them polished so I would be able to see how they look on the new Anzo 7' LED headlights when they arrive.They still need to be chrome plated.
-
Steph
- Projects
- Posts: 3201
- Joined: August 14th, 2008, 2:02 am
- Province/State: South Australia
- Hometown: Adelaide
- Model: 1978 Hatchback
Re: Steph's 1978 Honda Civic 1200
It thought I'd post a batch of photos on how to modify the rear bumper mounts for all you visual learners. I used a 225mm long piece of 75mm x 3mm (3" x 1/8") flat bar with 2 bends, with one at 85mm and the other 195mm which I did with a rubber mallet while the flat metal bar was being held in a vice. Real basic stuff. The 2 bends were at 4 degrees and 13 degrees. Again, I just crimped the flat bar in a vice and banged it with a mallet until I reached the correct angle. I used a pedestal drill with an adjustable vice, but you could also use a hand drill. The extra hole is for the power wire to go through with all external wiring going internal with no modification to the wiring loom at all (it goes inside the rear hatch trim panel where it's hidden away). The original bumper mounts act as the perfect templates for marking your holes out to drill. Of course some kind of welder is going to be needed. I tacked it all up with it all bolted tightly in the rear bumper (so I effectively used the bumper as a welding jig). That way I could angle the factory-made ends perfectly to match the new centre mounting plates. I then cut a 265mm long narrow piece of 3mm plate to cap the mount off so the bolts weren't visible from overhead. I used some cardboard to make the template and traced around the mount with a pen. The straight edge of the cap is positioned to be parallel to the line of the bumper (again this is all done while bolted in the bumper which is the welding jig for this job).
edit: I added 2 more photos below which show the angles the OEM parts are welded at. For those struggling, that's 29 degrees on the end that points outside (where the rubber bumper ends attach), and 55 degrees on the opposite end (side of mount closest to the number plate/centre of car).
edit: I added 2 more photos below which show the angles the OEM parts are welded at. For those struggling, that's 29 degrees on the end that points outside (where the rubber bumper ends attach), and 55 degrees on the opposite end (side of mount closest to the number plate/centre of car).
-
Steph
- Projects
- Posts: 3201
- Joined: August 14th, 2008, 2:02 am
- Province/State: South Australia
- Hometown: Adelaide
- Model: 1978 Hatchback
Re: Steph's 1978 Honda Civic 1200
Took a couple of pics with one of the Anzo headlights mounted in a headlight bezel. Notice that the plug fitted is a H4 type, so these just plug straight in to the factory fitted plug. Photos can't do them justice, they look that good.
-
5door79
Re: Steph's 1978 Honda Civic 1200
Hey Steph, I’ve read through your whole project from start to finish and its given me lots of inspiration to get started on my own civic, it’s a 5 door 79 with an EB3 in it, I was just wondering if you have a link to any rebuild kits for the EN1 keihins and also if you could send me the jet sizes for your 32 dellorto’s, hopefully you’ll see this, also I created an account on this forum just to post this haha
-
Steph
- Projects
- Posts: 3201
- Joined: August 14th, 2008, 2:02 am
- Province/State: South Australia
- Hometown: Adelaide
- Model: 1978 Hatchback
Re: Steph's 1978 Honda Civic 1200
The carburetor kits were from a Honda Goldwing bike that used the same carburetor (slightly different). From memory 90% of the parts were identical with only a fuel bowl seal being slightly different but it was 'adaptable' (I think I had to trim some rubber with the scissors off the outside edge).5door79 wrote: ↑January 20th, 2020, 9:33 amHey Steph, I’ve read through your whole project from start to finish and its given me lots of inspiration to get started on my own civic, it’s a 5 door 79 with an EB3 in it, I was just wondering if you have a link to any rebuild kits for the EN1 keihins and also if you could send me the jet sizes for your 32 dellorto’s, hopefully you’ll see this, also I created an account on this forum just to post this haha
In regards to the jet and venturi sizes I was super lucky to get all of those from Neil (can't think of his user name) who in my opinion is the only person who got these working the way God intended. He fitted the smaller 32mm Dellortos rather than the larger 35s. For the street I think the 32s are the way to go. Anyway, it took him a long time (including fitting an O2 sensor and fuel ratio meter) and lots of changes until he got the ideal fuel/air ratios and the car became a dream to drive... then I sheepishly 'wandered up' and asked him if he'd share all the sizes and settings with me which he kindly did. He also had fitted a 1300 crank and the same camshaft I'm using (actually it's a copy because I managed to snag an as-new RS camshaft from Japan years ago). Anyway, I have no idea where all those details are now so at best I would have to try and think of where I wrote it all down... I'll have to get back to you on that one. Anyway, in regards to the Goldwing carburetor kits, I seem to remember I just looked at the photos the sellers on the bay provide and I recognised the one that looked almost identical. The fuel bowl gasket had a tiny difference, like an extra tab of rubber that I needed to trim off or something if my memory serves me, which it often doesn't! Good luck.
-
Steph
- Projects
- Posts: 3201
- Joined: August 14th, 2008, 2:02 am
- Province/State: South Australia
- Hometown: Adelaide
- Model: 1978 Hatchback
Re: Steph's 1978 Honda Civic 1200
I had to work out how to mask these screws for chrome and I came up with an idea to use standard mains power cable that I spliced open to obtain the individual strands of copper. I then used two pieces about 4" long to wrap the end of the screw and then I wrapped the other end around the tip of my pointy-nose pliers to create a loop. The cable was for lighting, so the copper strands were not too thick to manipulate. In fact I found I could bend and wrap it with my fingers pretty easily. Once I'd wrapped it I dipped it in Seal 'n' Peel to mask the threads for chrome plating. Now the million dollar question is where do these screws belong??? !!!
I thought they were from the grill but the parts book says those screws are all self tapping and this has a flat end... plus a counter sunk head.
Name That Screw!... somebody... please
I thought they were from the grill but the parts book says those screws are all self tapping and this has a flat end... plus a counter sunk head.
Name That Screw!... somebody... please
-
Steph
- Projects
- Posts: 3201
- Joined: August 14th, 2008, 2:02 am
- Province/State: South Australia
- Hometown: Adelaide
- Model: 1978 Hatchback
Re: Steph's 1978 Honda Civic 1200
I have been doing nothing of late, other than gardening. Charlie my 7 year old Border Collie died unexpectedly 10 weeks ago and it's been hard to get interested in the Civic. Hard to get interested in anything at all. I can't believe how hard this one hit me. I'm still nowhere near over it. Still feels like it was only a week ago.
Anyway, I did however purchase a set of headlight springs with stainless cap head hardware from the much valued Civic Garage. As you'd expect, I stripped the blue finish off which was really hard to get off. I can attest that it has excellent durability. I couldn't get it off the insides but you won't be able to see any of that surface once the screws are in place. I then gave the springs a good brush with a fine stainless 'toothbrush' to break free the paint, and then a rub over with 1500 grit paper and finally a quick buff. I hate buffing small items because they invariable get caught in the polishing mop while I'm polishing and shoot off like a bullet and it can take ages to find the part afterwards. So far I have always managed to find things but a few times I was looking for ages and got pretty stressed (and dirty!) crawling around on the floor. These are the last parts I have to prepare and send to chrome. It occurred to me today that I better do it this week in case there is some sort of shutdown. At the moment my region is good, but they may give everybody some early holidays, even though we are lucky to have never had a person to person issue and everything has been successfully quarantined to date, there is always the possibility things could change. So it's off to the chrome platers.
Anyway, I did however purchase a set of headlight springs with stainless cap head hardware from the much valued Civic Garage. As you'd expect, I stripped the blue finish off which was really hard to get off. I can attest that it has excellent durability. I couldn't get it off the insides but you won't be able to see any of that surface once the screws are in place. I then gave the springs a good brush with a fine stainless 'toothbrush' to break free the paint, and then a rub over with 1500 grit paper and finally a quick buff. I hate buffing small items because they invariable get caught in the polishing mop while I'm polishing and shoot off like a bullet and it can take ages to find the part afterwards. So far I have always managed to find things but a few times I was looking for ages and got pretty stressed (and dirty!) crawling around on the floor. These are the last parts I have to prepare and send to chrome. It occurred to me today that I better do it this week in case there is some sort of shutdown. At the moment my region is good, but they may give everybody some early holidays, even though we are lucky to have never had a person to person issue and everything has been successfully quarantined to date, there is always the possibility things could change. So it's off to the chrome platers.
-
Phil
- Projects
- Posts: 65
- Joined: November 30th, 2018, 3:58 am
- Province/State: SA
- Model: 1975 Hatchback
Re: Steph's 1978 Honda Civic 1200
Very sorry to hear about Charlie. Life can be extremely cruel 
The headlight springs look great! I personally love the blue, but your build screams chrome. I can vouch for the quality of the hardware too!
Hope you're coping okay with the covid19 saga. I've been making the most of my time off, pure civic restoration time.

The headlight springs look great! I personally love the blue, but your build screams chrome. I can vouch for the quality of the hardware too!
Hope you're coping okay with the covid19 saga. I've been making the most of my time off, pure civic restoration time.
-
Steph
- Projects
- Posts: 3201
- Joined: August 14th, 2008, 2:02 am
- Province/State: South Australia
- Hometown: Adelaide
- Model: 1978 Hatchback
Re: Steph's 1978 Honda Civic 1200
Thanks Phil, I actually think they have it under control here and the shops here are getting more and more back on the shelves too, so I've stopped stressing about it and I've just been keeping busy. I went to Windsor Electroplating to drop my chrome work off the other day and found they had gone out of business. I was telling my brother and he told he works at a place not far from A Class Metal Finishing at Lonsdale and he's going to take it there for me. They're pretty much the best platers in Adelaide but I'm too lazy to drive all the way out to Lonsdale. I got excellent work back from Windsor, but I had to buff out a mark here and there. In fact I used to feel a certain anxiety with Windsor, whereas A Class is a top quality outfit. I had some other plating done there years ago and it was perfect. They charge more, but that's probably one of the reasons they're still in business. Rob over at Windsor Plating used to be soo cheap, that's one of the reasons I went there, but also because it's not too far to drive. He sold the business back when it was still a going concern, then stayed on as an employee. He got out of there intact, but the guy he sold it to didn't do so well. Sad to see a another small business fold. Anyway, I'm hoping my brother is going to drop by and pick up my parts tomorrow and take them in Monday. Gotta help stimulate the local economy!
-
Steph
- Projects
- Posts: 3201
- Joined: August 14th, 2008, 2:02 am
- Province/State: South Australia
- Hometown: Adelaide
- Model: 1978 Hatchback
Re: Steph's 1978 Honda Civic 1200
My brother has all my parts and is dropping them off to A Class Metal Finishers today. I'm getting excited to see all my chrome parts! 
quick edit: no sooner had I posted this than I got a call from A Class Metal Finishers where my brother was at 9 am this morning. It's all getting done and I had a good chat with one of the guys there and explained the whole situation how I used to go to Windsor Electroplating and now they are closed. I got the impression these guys are super fussy so it should be good to hear back from them once they see my work and it's all done.
quick edit: no sooner had I posted this than I got a call from A Class Metal Finishers where my brother was at 9 am this morning. It's all getting done and I had a good chat with one of the guys there and explained the whole situation how I used to go to Windsor Electroplating and now they are closed. I got the impression these guys are super fussy so it should be good to hear back from them once they see my work and it's all done.
