
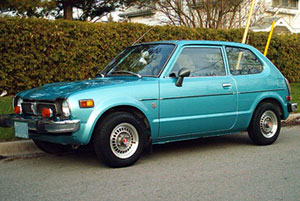

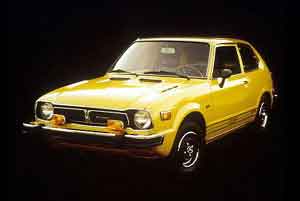

Restoration: Shreck 1978 Honda Civic (1200)
From my other website in 2011 Upgrade Hondamatic to Second Gen with Overdrive.
-
Shreck

- Posts: 6
- Joined: December 31st, 1969, 7:00 pm

- Province/State: Ontario
- Hometown: Ajax
- Model: 1978 Hatchback
 Restoration: Shreck 1978 Honda Civic (1200)
An old post from my web site hondagaragediy.com back in 2011
I cannot begin to describe the amount of time that has been put into this car but I will do my best. However the times I worked on it brought pleasure and many other times I wish I had never bought it at all, just wishing it would just go away. Frustration was brought on the the gross amount of rust as well as the lack of good parts locally. Aiding the problems with my back added by many hours working under the car scrapping and sanding rust. This restoration is more involved than I was prepared to put time in for, lack of proper space and the never ending lack of time almost caused me to sell the pile of junk a few times.
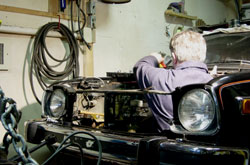
The car was purchased in October of 1999 from a body shop, the owner of the shop said it was his own since he opened his shop. Since then his son had been driving it, “The Demise” of this little car. The owner said all it needed was an exhaust gasket, you think. I talked the owner down to $500.00 from $750.00 as he could not start the car. When I finally picked up the car it was running, so I drove it home.
I hate sand blasting only because no matter how you dress you still end up with sand in your shorts. I think I need new glass for my goggles though. These work great if you have to get up close if you are working under the car, any thing else and the lens would only last seconds.
These are welding goggles, I just removed the filter glass and taped up the little breather holes. I put some foam weather stripping on the goggles where they come in contact with my face, this does a great job of keeping the sand out.
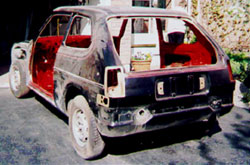
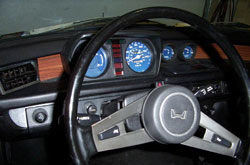
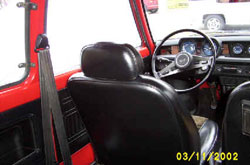
The floor of the car was completely gone on the passenger side, held together by undercoating and carpet, the drivers side of the floor was 25 percent gone. The windshield had a deep crevasse from a absent wiper blade, tires are badly worn, and unsightly rotten moldy disgusting smoke and garbage stained interior. Oh I forgot to mention the mouse nest in the air cleaner and vents. Upon inspection the dash had a huge hole in it from the heater controls to the right side of the steering column made for a huge modern Honda stereo, which kept falling out.
After stripping the car completely except for the engine and wheels I discovered that it had been in an accident, the passenger side door and pillar were poorly repaired, this side was pushed in by approx. 1″. The front drivers side had been pushed in and covered up by new bumper and fenders.
It was now time to take stock of the situation, I was off on the wrong foot to find a car in such poor condition. But we must go on. I surfed the internet to find parts or whole cars, I found an 1978 Civic north of London Ontario with lots of extra parts but not the passenger door I really wanted. I towed it back to Ajax on a dolly but with the holes in the floor I ended up with less than I started.

With this acquisition there was parts to help me rebuild. New front calipers, rotors, shocks, 1 rear shock the other is laying on some country road (must have fallen through the hole in the floor), 2 sets of drive axles, a 1976 hood and bumpers, an extra exhaust manifold, good drivers door and hatch.
Before I started shaping metal and welding I completely sand blasted the interior, wheel wells, and the underside up to the engine compartment. As well as removing all the old undercoating.
 First step was to torch and chisel out the old cancer parts of the floor, the seat rails & outer mounts were removed after carefully measuring &recording the distance from three different angle points to areas not affected by restoration, these measurements will be used to place the parts before welding. I used the seat rail and right rear mount from the donor car. Even though the rear mount was from the same year and make it was not quite the same so I had to modify the base to make it fit. A sharp wood chisel is great for separating spot welds as well as getting into spots that you can’t reach with a nibbler. Before separating spot welds I drilled out the center with a small drill bit.
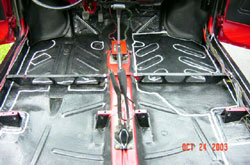
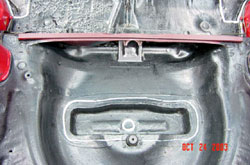
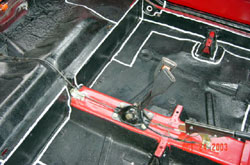
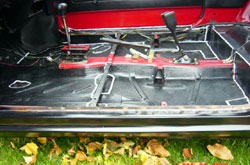
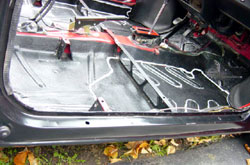
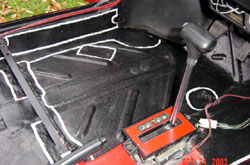
I checked stock for a new floor at Honda and found that they are no longer available. So came the task of making one by hand, which I dreaded doing. The first floor was so warped that I could not get it to fit very well. I scrapped that and started over again. This time I made it flat and then welded it in that way. To add the strength it needs I cut the ribs out of the old floor and welded them onto the new one I made. And the same underneath. This made it very back breaking doing all this welding from inside the car rather than on the bench. It was worth it as the floor was nice and flat and strong.
Making Rocker Panels
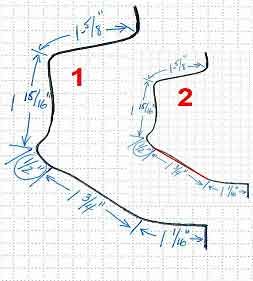
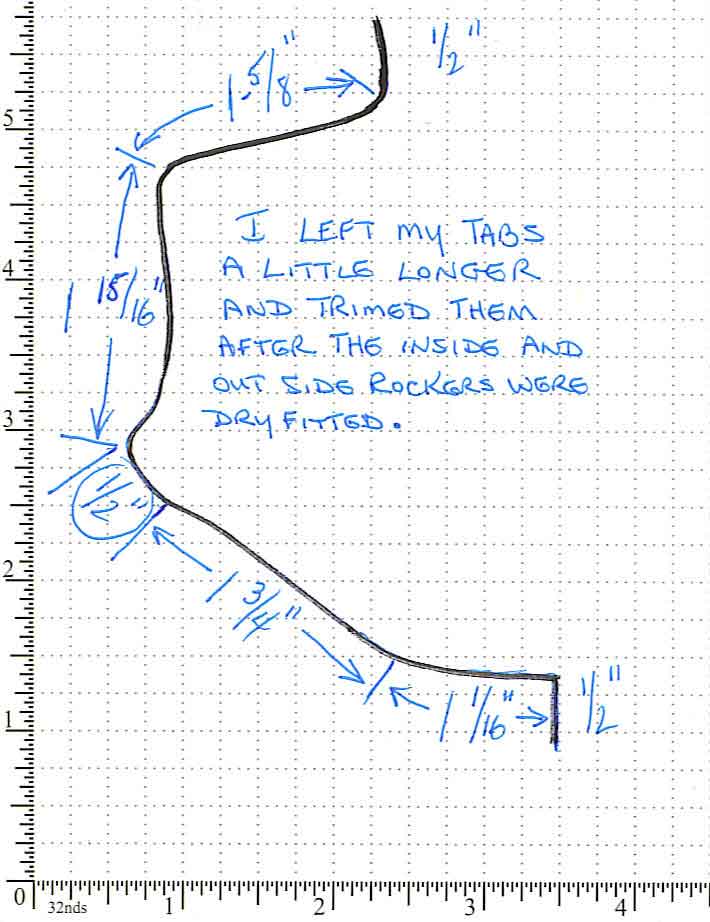
I took some pictures and measurements of the slice of rocker panel I have. If you have any questions post them here or email me, I will be glad to help.
To do the inside it is a major job.
First I removed the interior and the seat rails, it makes it easier to remove the inner rockers. Drill out the spot welds and try to remove the section with a very sharp wood chisel in as big a piece as possible. Try not to drill through to the outside. But if you do you can use the holes to weld the new piece back in. I used a piece of Vynal flooring to make a pattern as it is stronger than cardboard and it can be cut with tin snips too. Remember when you make the inner piece to include the bit that goes below the floor. Also when I made the outer rocker I made the bottom edge to wrap under and sandwich the floor tab to the inner rocker.
Depending on how much is being replace it can become more difficult to bend; when I made mine I figured out the measurements and transferred them to a small piece of 22 gauge sheet metal. This I could figure out easily where to make the first and last bends. I believe I started from the middle and worked my way to the edges. Practice first and then make what ever length you need.
When I made them they went from the rear wheel well to under the front fender. The other side was from the back of the door to the front under the fender. These went from the bottom to the top outer lip where the weather stripping seals against. In one small area on the top flat under the door I repaired it separately to make it easier. I left about ¾ to ½” to overlap in some cases less depending on the extent of the rust.
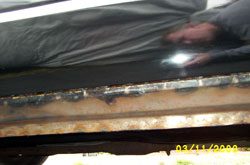
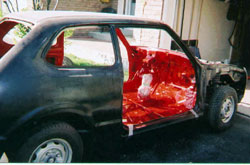
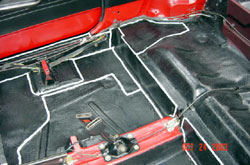
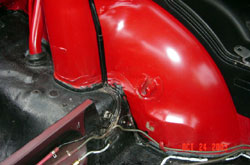
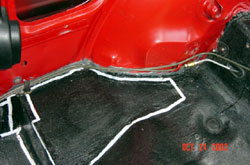
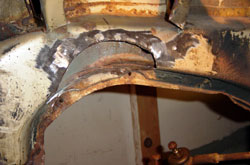
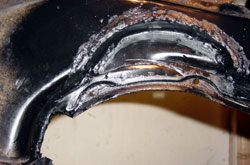
After welding in the floor I primed and painted it red then sealed it with joint seal. To protect the floor from future moisture I sealed it with 2 part epoxy bed liner (2 coats). The rocker panels were full of body filler and rust, the passenger side had been patched several times all the way down to the rear wheel well. This is where I found a piece of clothing holding out the patch of metal put in by the previous owner. This is where the car had been hit in the side, I pulled the side out and replaced the pillar with the one from the donor car.
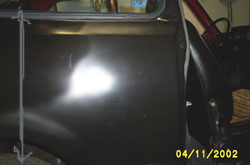

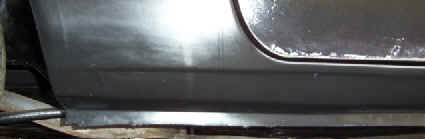
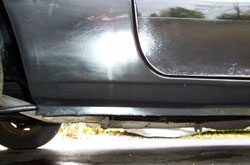
I made new rocker panels inside and out. To do this I made a pattern from vinyl flooring before removal of the rusted part, once removed I matched it up to the pattern and marked the holes for the wiring harness and seat belt holes. Picture of finished passenger side. Then I transplanted the front half of the rear passenger quarter from the donor car
When I took out the windshield I had to smash out the glass to save the rubber seal. The old wind screen had a gouge in it from the wipers. When I went to take the screen out of the donor car the rubber seal was stuck to the glass like glue, so I had to cut the rubber to save the glass. This was done in cool weather, in the summer heat it is a lot easier to get out with out cutting the rubber.
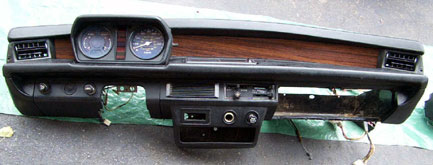 I found a dashboard In a virtually untouched Civic at a salvage yard partially buried under a GMC van. Witch I had to convince the yard to move. All I had to do was replace the top padding above the vents.
To put in the good wind screen I used lots of soap and some 1/4″ sash cord around the inside lip of the seal. Starting at one corner and working my way around pulling out the cord as I went, this cannot be done alone. My wife aided in the installation by pressing on the glass as I removed the cord from the inside.
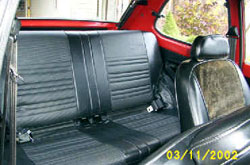
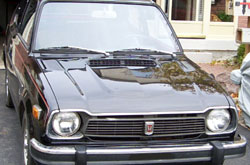
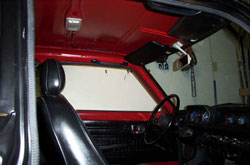 Notice in the pictures below of the roof liner has yellowed around the edges. I have died the visors black already. When done all I have to do is paint the rear view mirror. The wrinkles will come out of the roof liner when the die dries.
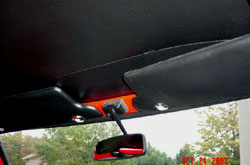
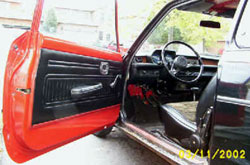
The interior door and rear panels were in such bad shape I had to mix the best of the two cars, to accomplish this I died them all black with upholstery die. It looks like new, at first the fabric swelled up but shrunk back to normal as the die dried.

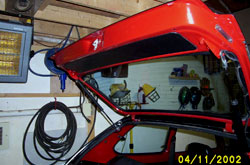
The hatch came from my donor car. The original hatch had patches of metal and body filler. I took the hatch off the donor car removed the glass and trim and sand blasted the small rust spots away. I then filled the tiny rust pits with a good quality surfacing putty (2 part).
My next installment was to be new bumpers & re-bar’s, but it’s not in the budget at this point. So I went back to the salvage yard and purchased a cross beam for a Reddi Rack, when cut to size and drilled for the mounts the 76 bumpers fit perfectly on my 78.
At this point I have created a problem as the 78 front turn signal lights will not fit under the 76 bumpers, for the backup lights I found a set at 77 style on no-links. For the front turn signals I got the 77 style from Jared in a trade for a back seat..
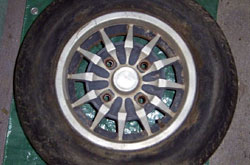
Last year I looked for the tires at Canadian Tire, the same place I used to get them when I had my 76 Civic, not anymore, I checked the major tire outlets and found out they are special order from Korea or from the USA. I checked out the new Wal-Mart in Ajax and to my surprise they had them in stock for about $25.00 ea. Actually my wife suggested that if no one else had them maybe Wal-Mart might, go figure.
Last tires and rims, as the story goes the original tires and rims were stolen for another 78 Civic I bought recently. I might use these rims depending on what they look like when I get them cleaned up. Guess not, I traded the rims for a 3speed automatic transmission to be put in this car at a later
date.
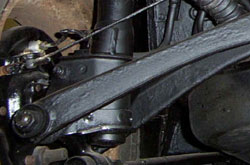
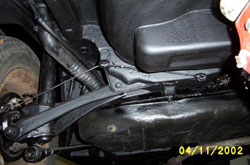
 I bought new rear struts from NAPA, they came from Halifax. The rear brake lines were badly rusted so I made new ones, where they exited the car I covered the lines with electrical heat shrink tubing before the connector was put on this will help keep the moisture out. Also new rear suspension bushings were put on. I sand blasted the rust from the parking brake parts & repainted them. The wheel cylinders are replaced as in the process of removal the studs broke off. I bought the wheel cylinders from Canadian Tire as well as brake shoes.
The exhaust is in good shape except for the muffler, I have to check around for a new one. The system is too long pushing the muffler out through the back valance panel . Also the heat shield for the resonator is rotten like Swiss cheese, I might see if I can find one of stainless steel from the scrap yard.
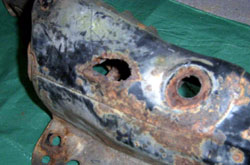
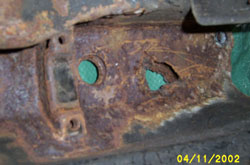
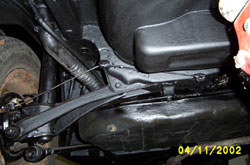
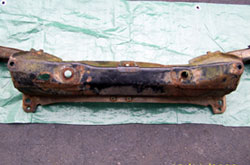
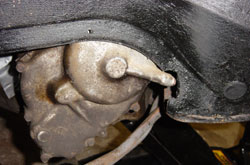
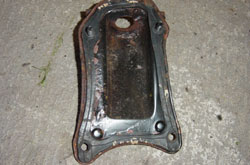
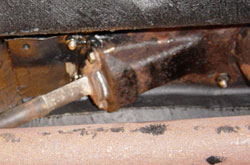
Currently I need to find the framing part for the steering rack as it has a hole right through it just above where the lower control arm is bolted on, If not I will have to get it repaired.
I checked with some well known body shops and they do not want to touch it.
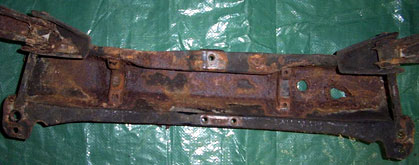
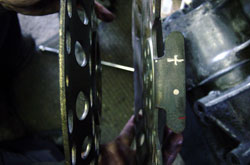
Above left is my new one I bought from Justin in BC, Center cross member has been sand blasted and painted. The balance of the frame will be sand blasted when the motor is removed.

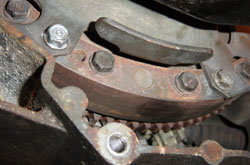
Left above will be sand blasted, notice the rust, New bearing and rotor backing plate will be replaced with new.
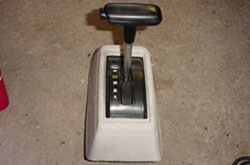
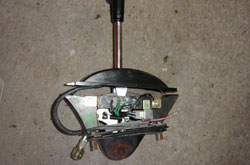
Bake and gas pedals were sand blasted and repainted. Component of the floor shifter were replace with new parts as well as new rubber for the pedals.
Sad part is these never made it to this car as I needed them for another car I bought Sept 2002, I did a motor and transmission swap.
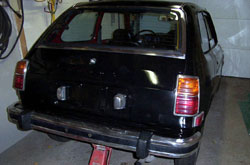
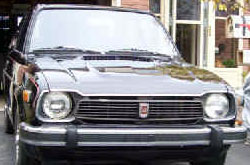
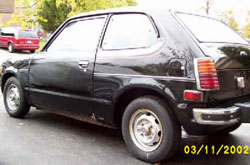
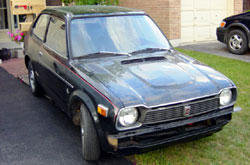
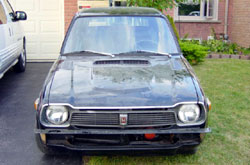
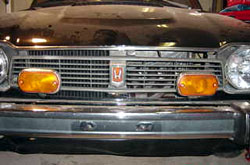
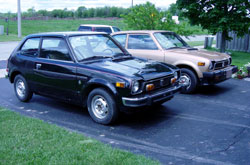
Here is the car October 2003, I changed my mind on the lights and I bought some 76 style front and rear turn signals from “H” Dave. The fronts will mount on the grille and the rears have the three
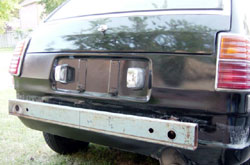
red sections instead. Here is the re-bar I spoke of earlier, Notice the big holes, they are for the round part of the inside of the bumper where the big rubber grommet/absorber goes. I made a small piece of steel channel with the nut welded to it so that the large bolts go right through the bumper with no problems as it is also in alignment with the back there the bumper bolts onto the cat.
I also picked up a Kamei air dam for the car off no-links
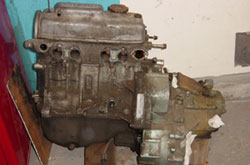
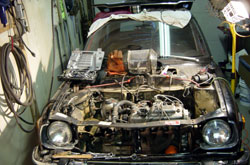
Motor above EB2 and Hondamatic is being used in place of the current smoking EB3, only problem was that there is no place to bolt on the drivers side motor mount. Further down the page you will see I have fabricated a bracket that bolts on the front and back side of the head and also through the holes for holding the upper timing cover on.
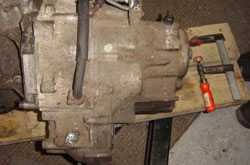
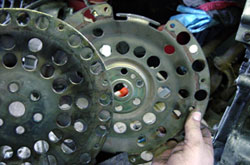

Transmission above is a 3speed from a 83 Civic wagon to be used instead of the current Hondamatic. The 3 speed still has to be shifted manually too. Notice the differences in the plate that mates the transmission to the motor. The one from the 3speed must be used to match up to the transmission. The bent tabs were used on the second gens for timing, these tabs have to be dealt with as there is a clearance problem between the transmission and motor.
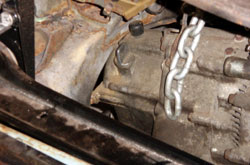
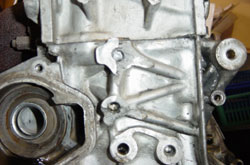
This is not a direct swap as some say it is as the frame rail must be cut for clearance. The bottom of the battery tray was cut away and the spot welds ground off to make an nice even cut in the rail. I welded a piece in the top of the opening to close the rail back up and sealed it with seam sealer.
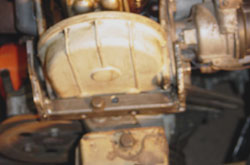
There is approx 1/2″ space on the end of the transmission where it meets the wheel well. Note the notch made in the top right picture.
Above required 3-speed shifter and cable entry cover for installation from the second generation Civic. Two new holes are drilled in very close proximity of the old holes from the original cover.
Selector cable entry cover installed, plate on the right is used, has markings for timing. Right picture – Tab has to be dealt with, I bent mine down, hope this works, I turned it over by hand and it clears pretty good.
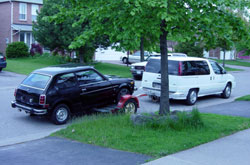
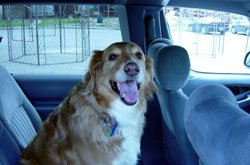
Next time I buy a house it will all depend on the garage size, this is too small but workable. Prince came along for the ride in the spring of 2004 when I moved the car to my in laws and picked up my other car. I gave up as I have run out of steam. Time to get out the other toy and get to some pleasure cruising and forget about the problems with this car.
Work done in 2004
 3 speed and motor swap, mounted 76/77 style bumpers, front turn indicators and back up lights. All red tail lights swapped in for the 78′s. Rear frame rail and control arms cleaned and painted. New front wheel bearings and seals. New front struts installed. Up graded to Weber 28DCD
Some distant thoughts and plans are to lower the car and make side skirts and possible rear wing or hatch spoiler. Also planned is a rear deck and floor console.
What is left to be done as of late spring 2004:
Rewire 2nd gen shifter, new rubber for doors, tires, mount Italian sport mirrors. mount Kamei air dam, fix rust hidden by rear bumper. Replace pitted door handles and license plate lights,
Restoration Chop Suey
I cannot begin to describe the amount of time that has been put into this car but I will do my best. However the times I worked on it brought pleasure and many other times I wish I had never bought it at all, just wishing it would just go away. Frustration was brought on the the gross amount of rust as well as the lack of good parts locally. Aiding the problems with my back added by many hours working under the car scrapping and sanding rust. This restoration is more involved than I was prepared to put time in for, lack of proper space and the never ending lack of time almost caused me to sell the pile of junk a few times.
- image.png (114.04 KiB) Viewed 3145 times
- image.png (64.35 KiB) Viewed 3144 times
- image.png (73.24 KiB) Viewed 3144 times
These are welding goggles, I just removed the filter glass and taped up the little breather holes. I put some foam weather stripping on the goggles where they come in contact with my face, this does a great job of keeping the sand out.
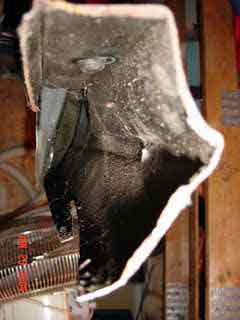
The floor of the car was completely gone on the passenger side, held together by undercoating and carpet, the drivers side of the floor was 25 percent gone. The windshield had a deep crevasse from a absent wiper blade, tires are badly worn, and unsightly rotten moldy disgusting smoke and garbage stained interior. Oh I forgot to mention the mouse nest in the air cleaner and vents. Upon inspection the dash had a huge hole in it from the heater controls to the right side of the steering column made for a huge modern Honda stereo, which kept falling out.
After stripping the car completely except for the engine and wheels I discovered that it had been in an accident, the passenger side door and pillar were poorly repaired, this side was pushed in by approx. 1″. The front drivers side had been pushed in and covered up by new bumper and fenders.
It was now time to take stock of the situation, I was off on the wrong foot to find a car in such poor condition. But we must go on. I surfed the internet to find parts or whole cars, I found an 1978 Civic north of London Ontario with lots of extra parts but not the passenger door I really wanted. I towed it back to Ajax on a dolly but with the holes in the floor I ended up with less than I started.
With this acquisition there was parts to help me rebuild. New front calipers, rotors, shocks, 1 rear shock the other is laying on some country road (must have fallen through the hole in the floor), 2 sets of drive axles, a 1976 hood and bumpers, an extra exhaust manifold, good drivers door and hatch.
Before I started shaping metal and welding I completely sand blasted the interior, wheel wells, and the underside up to the engine compartment. As well as removing all the old undercoating.
First step was to torch and chisel out the old cancer parts of the floor, the seat rails & outer mounts were removed after carefully measuring &recording the distance from three different angle points to areas not affected by restoration, these measurements will be used to place the parts before welding. I used the seat rail and right rear mount from the donor car. Even though the rear mount was from the same year and make it was not quite the same so I had to modify the base to make it fit. A sharp wood chisel is great for separating spot welds as well as getting into spots that you can’t reach with a nibbler. Before separating spot welds I drilled out the center with a small drill bit.I checked stock for a new floor at Honda and found that they are no longer available. So came the task of making one by hand, which I dreaded doing. The first floor was so warped that I could not get it to fit very well. I scrapped that and started over again. This time I made it flat and then welded it in that way. To add the strength it needs I cut the ribs out of the old floor and welded them onto the new one I made. And the same underneath. This made it very back breaking doing all this welding from inside the car rather than on the bench. It was worth it as the floor was nice and flat and strong.
Making Rocker Panels
I took some pictures and measurements of the slice of rocker panel I have. If you have any questions post them here or email me, I will be glad to help.
To do the inside it is a major job.
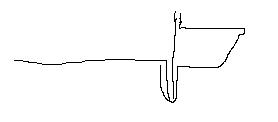
First I removed the interior and the seat rails, it makes it easier to remove the inner rockers. Drill out the spot welds and try to remove the section with a very sharp wood chisel in as big a piece as possible. Try not to drill through to the outside. But if you do you can use the holes to weld the new piece back in. I used a piece of Vynal flooring to make a pattern as it is stronger than cardboard and it can be cut with tin snips too. Remember when you make the inner piece to include the bit that goes below the floor. Also when I made the outer rocker I made the bottom edge to wrap under and sandwich the floor tab to the inner rocker.
Depending on how much is being replace it can become more difficult to bend; when I made mine I figured out the measurements and transferred them to a small piece of 22 gauge sheet metal. This I could figure out easily where to make the first and last bends. I believe I started from the middle and worked my way to the edges. Practice first and then make what ever length you need.
When I made them they went from the rear wheel well to under the front fender. The other side was from the back of the door to the front under the fender. These went from the bottom to the top outer lip where the weather stripping seals against. In one small area on the top flat under the door I repaired it separately to make it easier. I left about ¾ to ½” to overlap in some cases less depending on the extent of the rust.
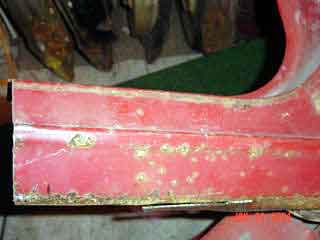
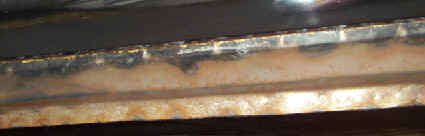
After welding in the floor I primed and painted it red then sealed it with joint seal. To protect the floor from future moisture I sealed it with 2 part epoxy bed liner (2 coats). The rocker panels were full of body filler and rust, the passenger side had been patched several times all the way down to the rear wheel well. This is where I found a piece of clothing holding out the patch of metal put in by the previous owner. This is where the car had been hit in the side, I pulled the side out and replaced the pillar with the one from the donor car.
I made new rocker panels inside and out. To do this I made a pattern from vinyl flooring before removal of the rusted part, once removed I matched it up to the pattern and marked the holes for the wiring harness and seat belt holes. Picture of finished passenger side. Then I transplanted the front half of the rear passenger quarter from the donor car
When I took out the windshield I had to smash out the glass to save the rubber seal. The old wind screen had a gouge in it from the wipers. When I went to take the screen out of the donor car the rubber seal was stuck to the glass like glue, so I had to cut the rubber to save the glass. This was done in cool weather, in the summer heat it is a lot easier to get out with out cutting the rubber.
I found a dashboard In a virtually untouched Civic at a salvage yard partially buried under a GMC van. Witch I had to convince the yard to move. All I had to do was replace the top padding above the vents.To put in the good wind screen I used lots of soap and some 1/4″ sash cord around the inside lip of the seal. Starting at one corner and working my way around pulling out the cord as I went, this cannot be done alone. My wife aided in the installation by pressing on the glass as I removed the cord from the inside.
Notice in the pictures below of the roof liner has yellowed around the edges. I have died the visors black already. When done all I have to do is paint the rear view mirror. The wrinkles will come out of the roof liner when the die dries.The interior door and rear panels were in such bad shape I had to mix the best of the two cars, to accomplish this I died them all black with upholstery die. It looks like new, at first the fabric swelled up but shrunk back to normal as the die dried.
The hatch came from my donor car. The original hatch had patches of metal and body filler. I took the hatch off the donor car removed the glass and trim and sand blasted the small rust spots away. I then filled the tiny rust pits with a good quality surfacing putty (2 part).
My next installment was to be new bumpers & re-bar’s, but it’s not in the budget at this point. So I went back to the salvage yard and purchased a cross beam for a Reddi Rack, when cut to size and drilled for the mounts the 76 bumpers fit perfectly on my 78.
At this point I have created a problem as the 78 front turn signal lights will not fit under the 76 bumpers, for the backup lights I found a set at 77 style on no-links. For the front turn signals I got the 77 style from Jared in a trade for a back seat..
Last year I looked for the tires at Canadian Tire, the same place I used to get them when I had my 76 Civic, not anymore, I checked the major tire outlets and found out they are special order from Korea or from the USA. I checked out the new Wal-Mart in Ajax and to my surprise they had them in stock for about $25.00 ea. Actually my wife suggested that if no one else had them maybe Wal-Mart might, go figure.
Last tires and rims, as the story goes the original tires and rims were stolen for another 78 Civic I bought recently. I might use these rims depending on what they look like when I get them cleaned up. Guess not, I traded the rims for a 3speed automatic transmission to be put in this car at a later
date.
I bought new rear struts from NAPA, they came from Halifax. The rear brake lines were badly rusted so I made new ones, where they exited the car I covered the lines with electrical heat shrink tubing before the connector was put on this will help keep the moisture out. Also new rear suspension bushings were put on. I sand blasted the rust from the parking brake parts & repainted them. The wheel cylinders are replaced as in the process of removal the studs broke off. I bought the wheel cylinders from Canadian Tire as well as brake shoes.The exhaust is in good shape except for the muffler, I have to check around for a new one. The system is too long pushing the muffler out through the back valance panel . Also the heat shield for the resonator is rotten like Swiss cheese, I might see if I can find one of stainless steel from the scrap yard.
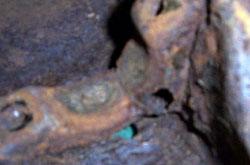
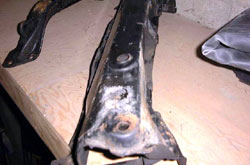
Currently I need to find the framing part for the steering rack as it has a hole right through it just above where the lower control arm is bolted on, If not I will have to get it repaired.
I checked with some well known body shops and they do not want to touch it.
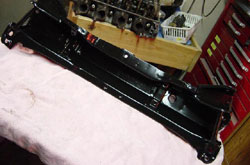
Above left is my new one I bought from Justin in BC, Center cross member has been sand blasted and painted. The balance of the frame will be sand blasted when the motor is removed.
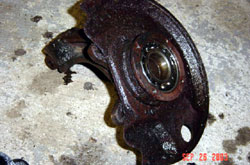
Left above will be sand blasted, notice the rust, New bearing and rotor backing plate will be replaced with new.
Bake and gas pedals were sand blasted and repainted. Component of the floor shifter were replace with new parts as well as new rubber for the pedals.
Sad part is these never made it to this car as I needed them for another car I bought Sept 2002, I did a motor and transmission swap.
Here is the car October 2003, I changed my mind on the lights and I bought some 76 style front and rear turn signals from “H” Dave. The fronts will mount on the grille and the rears have the three
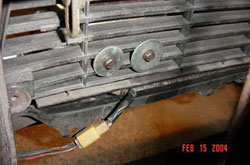
red sections instead. Here is the re-bar I spoke of earlier, Notice the big holes, they are for the round part of the inside of the bumper where the big rubber grommet/absorber goes. I made a small piece of steel channel with the nut welded to it so that the large bolts go right through the bumper with no problems as it is also in alignment with the back there the bumper bolts onto the cat.
I also picked up a Kamei air dam for the car off no-links
Motor above EB2 and Hondamatic is being used in place of the current smoking EB3, only problem was that there is no place to bolt on the drivers side motor mount. Further down the page you will see I have fabricated a bracket that bolts on the front and back side of the head and also through the holes for holding the upper timing cover on.
Transmission above is a 3speed from a 83 Civic wagon to be used instead of the current Hondamatic. The 3 speed still has to be shifted manually too. Notice the differences in the plate that mates the transmission to the motor. The one from the 3speed must be used to match up to the transmission. The bent tabs were used on the second gens for timing, these tabs have to be dealt with as there is a clearance problem between the transmission and motor.
This is not a direct swap as some say it is as the frame rail must be cut for clearance. The bottom of the battery tray was cut away and the spot welds ground off to make an nice even cut in the rail. I welded a piece in the top of the opening to close the rail back up and sealed it with seam sealer.
There is approx 1/2″ space on the end of the transmission where it meets the wheel well. Note the notch made in the top right picture.
Above required 3-speed shifter and cable entry cover for installation from the second generation Civic. Two new holes are drilled in very close proximity of the old holes from the original cover.
Selector cable entry cover installed, plate on the right is used, has markings for timing. Right picture – Tab has to be dealt with, I bent mine down, hope this works, I turned it over by hand and it clears pretty good.
Next time I buy a house it will all depend on the garage size, this is too small but workable. Prince came along for the ride in the spring of 2004 when I moved the car to my in laws and picked up my other car. I gave up as I have run out of steam. Time to get out the other toy and get to some pleasure cruising and forget about the problems with this car.
Work done in 2004
3 speed and motor swap, mounted 76/77 style bumpers, front turn indicators and back up lights. All red tail lights swapped in for the 78′s. Rear frame rail and control arms cleaned and painted. New front wheel bearings and seals. New front struts installed. Up graded to Weber 28DCDSome distant thoughts and plans are to lower the car and make side skirts and possible rear wing or hatch spoiler. Also planned is a rear deck and floor console.
What is left to be done as of late spring 2004:
Rewire 2nd gen shifter, new rubber for doors, tires, mount Italian sport mirrors. mount Kamei air dam, fix rust hidden by rear bumper. Replace pitted door handles and license plate lights,
