
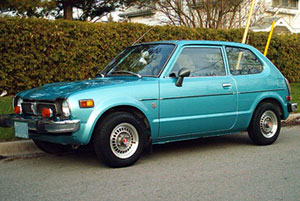

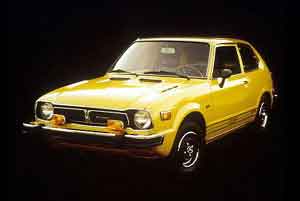

Restoration: 1978 Honda Civic (1200) Part 2
Repairing the rust holes and lots of welding.
-
Randy

- Administrator

- Posts: 1450
- Joined: April 7th, 2005, 9:06 pm

- Province/State: Ontario
- Hometown: Ajax
- Model: 1978 Hatchback
Re: Restoration: 1978 Honda Civic (1200) Part 2
Finally got the little fabricated piece put in.
- Attachments
-
-
-
Randy
- Administrator
- Posts: 1450
- Joined: April 7th, 2005, 9:06 pm
- Province/State: Ontario
- Hometown: Ajax
- Model: 1978 Hatchback
Re: Restoration: 1978 Honda Civic (1200) Part 2
Here is the back floor passenger side floor repaired, I did not include it in the previous posts.
This bit here has to be welded on under the back seat where the holes are, this is the section where the fuel sending wire runs to under the dash.
I first have to make a repair under the floor where this bit attaches
This is where the little panel goes, not very nice looking.
This is a bit of what the brace will look like under the floor.
Here is the front floor passenger side floor repaired.
This is the next project to tackle, looks a little difficult. I checked the alignment with the upper hinge compared to the other side and looks a bit off,
The alignment on the inside looks way off for some reason, appears to be pushed in. I don't want to touch it as the door may not sit flush with the front fender after the repairs.
I will be welding a small brace to the inner pillar to keep it from moving while I remove the outer pillar skin to make repairs.
I will be cutting it just below the upper hinge in alignment with the front cowl drain. Remove the spot welds and carefully take it off without disturbing the inner pillar.
I can then put it on the bench to straighten out the ripples and flatten out the body pull holes made by the body shop. Then I can weld them up and replace the rotten sections.
Sounds easy?
- Back Seat Floor Pan Repaired
- Back Seat Floor Pan Repaired
I first have to make a repair under the floor where this bit attaches
- Under the floor panel
- Under Floor Rot
This is a bit of what the brace will look like under the floor.
- Under Floor Brace
- Under_Floor_panel.jpeg (52.72 KiB) Viewed 1918 times
- Front Passenger Side Floor Repaired
The alignment on the inside looks way off for some reason, appears to be pushed in. I don't want to touch it as the door may not sit flush with the front fender after the repairs.
I will be welding a small brace to the inner pillar to keep it from moving while I remove the outer pillar skin to make repairs.
- Where to cut
- IMG_5817_cut.JPG (18.81 KiB) Viewed 1919 times
I can then put it on the bench to straighten out the ripples and flatten out the body pull holes made by the body shop. Then I can weld them up and replace the rotten sections.
Sounds easy?
- The Next Step in the repairs
-
Randy
- Administrator
- Posts: 1450
- Joined: April 7th, 2005, 9:06 pm
- Province/State: Ontario
- Hometown: Ajax
- Model: 1978 Hatchback
Re: Restoration: 1978 Honda Civic (1200) Part 2
Pillar has been removed, I made a pattern from the drivers side and reversed it using carbon paper.
It’s a complicated piece to re-produce.
It’s a complicated piece to re-produce.
- Attachments
-
-
-
-
-
-
-
-
-
-
-
-
-
-
Randy
- Administrator
- Posts: 1450
- Joined: April 7th, 2005, 9:06 pm
- Province/State: Ontario
- Hometown: Ajax
- Model: 1978 Hatchback
Re: Restoration: 1978 Honda Civic (1200) Part 2
I have the most part of the door pillar layout done and have started to cut and weld pieces to make it fit.
I made the pattern for the other side and then reversed it using carbon paper onto the sheet metal.
I will soon have a new video to show the progress of the pillar re-build.
Before I make the final attachment to car I need to get the back of the fender fitting over the top too.
I made the pattern for the other side and then reversed it using carbon paper onto the sheet metal.
I will soon have a new video to show the progress of the pillar re-build.
Before I make the final attachment to car I need to get the back of the fender fitting over the top too.
- Attachments
-
-
-
-
-
-
-
-
-
-
-
-
-
-
-
-
Randy
- Administrator
- Posts: 1450
- Joined: April 7th, 2005, 9:06 pm
- Province/State: Ontario
- Hometown: Ajax
- Model: 1978 Hatchback
Re: Restoration: 1978 Honda Civic (1200) Part 2
More done today, had a lot of blow throughs mating a piece of the old rocker to the door pillar.
The end is welded on and the hole is drilled out on the end and the flange on the bottom. Next is to drill the hinge holes and make the arch in the opening. I may take that bit out of the original part if it is not to smushed.
The end is welded on and the hole is drilled out on the end and the flange on the bottom. Next is to drill the hinge holes and make the arch in the opening. I may take that bit out of the original part if it is not to smushed.
- Attachments
-
-
-
-
-
-
Randy
- Administrator
- Posts: 1450
- Joined: April 7th, 2005, 9:06 pm
- Province/State: Ontario
- Hometown: Ajax
- Model: 1978 Hatchback
Re: Restoration: 1978 Honda Civic (1200) Part 2
Starting to prepare the inner hinge bit, there is a spacer that was in between it and the lower pillar. It was seriously rotted out. I sprayed it with copper weld through primer as it seems to be better than the zinc weld through primer.
Actually the inner hinge mount was pushed in, and had rust holes in the side. I hammered out the inner pillar with an air chisel with the hammer attachment.
I dry fitted the front fender but found I need to knock off the front corner of the bottom of the pillar as it should have an angle or slight round on it.
- Attachments
-
-
-
