|
Restoration Project
|
|
The Second Generation Honda restoration
was performed by Jack. |
|
 This
story begins about a year and a half ago. I was in the market for a used
car, and I knew that I wanted some sort of compact car for the good gas
mileage and ease of parking. Also, I had a pretty tight budget (less than
$5K). I did much research on the Internet and I found that old Hondas fit
my needs quite well. While driving through town I spotted one on the side
of the road with a "For Sale" sign in the window. I gave the car an
initial inspection and took the owner's phone number. It was a 1983 Honda
Civic Sedan. It was brown, the rear window was shattered, and the asking
price was $200. Surprisingly low I thought. This
story begins about a year and a half ago. I was in the market for a used
car, and I knew that I wanted some sort of compact car for the good gas
mileage and ease of parking. Also, I had a pretty tight budget (less than
$5K). I did much research on the Internet and I found that old Hondas fit
my needs quite well. While driving through town I spotted one on the side
of the road with a "For Sale" sign in the window. I gave the car an
initial inspection and took the owner's phone number. It was a 1983 Honda
Civic Sedan. It was brown, the rear window was shattered, and the asking
price was $200. Surprisingly low I thought.
Later that week I found out why. I talked
to the owner and he informed me that the head gasket was blown and the
engine had overheated. Also, it burned oil and the clutch slipped. The
engine started, which was good, but obviously coolant was leaking into the
cylinders as a giant plume of smoke came out of the exhaust. Although this
would have turned off most potential buyers, I thought a project car could
be a lot of fun. So I offered the owner $150 and he accepted.
I was now the proud owner of a second
generation Civic. Seeing as how the car wasn't exactly in driving
condition (with the smoke screen and what not), we towed the car to my
garage. However, I was rather busy at the time, and the car sat there for
a few months. Eventually, the project got rolling, and with the help of a
friend-of-the-family who also happens to be a professional mechanic, we
finished the project last winter. It felt really good to see the all those
hours finally materialize into a working car. This car is so comfortable
to drive. Everything just feels right. The seats are supportive, the
steering is great (I love no power assist), and the 5-speed has clearly
defined gates. |
|
|
|
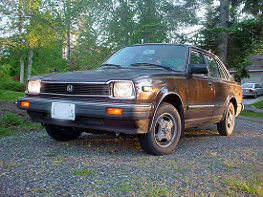
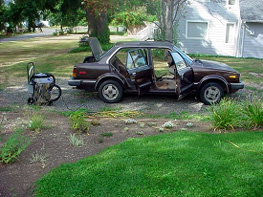
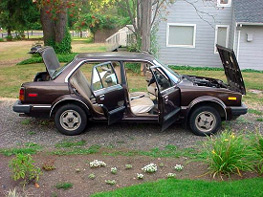
The before pictures |
  Here
is an angle from elevation shot, I really dig the forward-opening hood Here
is an angle from elevation shot, I really dig the forward-opening hood |
|
|
|
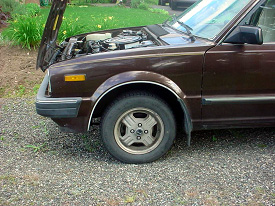
Detail shots |
 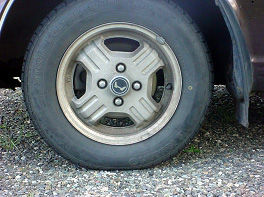 Here
you can see the factory optional alloy wheels. They measure 13 inches by
4.5 inches. I know, they are very skinny. But they are made of aluminum
alloy by Enkei, and I like the big four spokes. Currently, I run
155/80-R13 tires. Here
you can see the factory optional alloy wheels. They measure 13 inches by
4.5 inches. I know, they are very skinny. But they are made of aluminum
alloy by Enkei, and I like the big four spokes. Currently, I run
155/80-R13 tires. |
|
|
|
Look Inside |
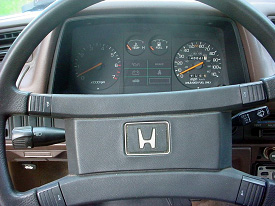 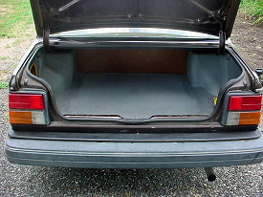 This
is the optional four-spoke sport steering wheel, and here is a view of the
interior of the trunk This
is the optional four-spoke sport steering wheel, and here is a view of the
interior of the trunk |
|
|
|
Paint |
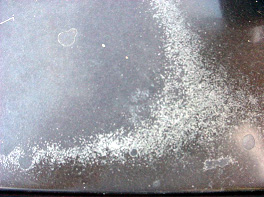 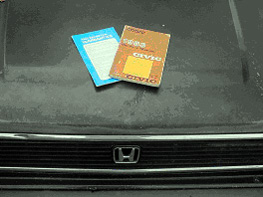 The
paint could use some work, The original owner's manual and warranty
booklet The
paint could use some work, The original owner's manual and warranty
booklet |
|
|
|
The Engine work begins |
 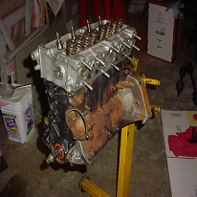 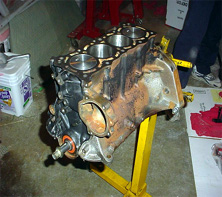 Here
are a few photos of the complete engine rebuild, Here is the crankshaft
after we put in new bearings, This is the engine with the crank and
pistons installed, This is the block with the newly-machined head bolted
on Here
are a few photos of the complete engine rebuild, Here is the crankshaft
after we put in new bearings, This is the engine with the crank and
pistons installed, This is the block with the newly-machined head bolted
on |
|
|
|
Internals Engine Bay |
 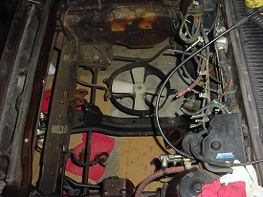 Finally,
ready for installation, Here is the empty engine bay with the radiator fan
hanging down Finally,
ready for installation, Here is the empty engine bay with the radiator fan
hanging down |
|
|
|
Installed Engine |
 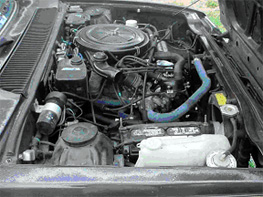 The
driver's side view of the installed engine & the passenger's side view of
the installed engine. The
driver's side view of the installed engine & the passenger's side view of
the installed engine. |
|
|
|
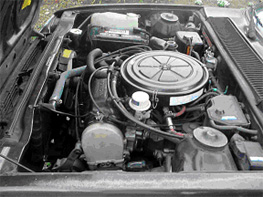
Installed Engine & Carpet |
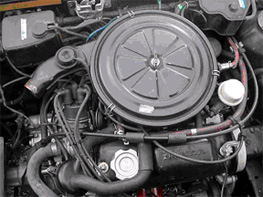  The
engine as seen from above. This engine is 1.5 liters and makes 67 hp at
5000 rpm and 79 lb-ft of torque at 3000 rpm. Not all that powerful, but
the car is light enough for it to be plenty spunky around town. The
engine as seen from above. This engine is 1.5 liters and makes 67 hp at
5000 rpm and 79 lb-ft of torque at 3000 rpm. Not all that powerful, but
the car is light enough for it to be plenty spunky around town.
Recently I have been doing some interior and exterior work.
I was worried that the carpet was moldy on the bottom, so I took out the
interior and rented a Rug Doctor to clean the carpet. |
|
|
|
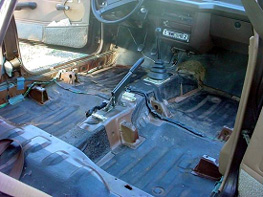
Interior & Flooring |
 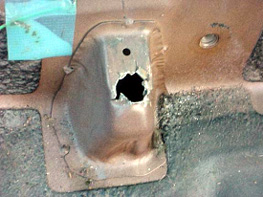 A
view to the rear of the car without the interior, While I was removing the
seats I found this. It looks like someone in this car's history took a
Sawzall to this seat bracket. Now I have some welding to do. A
view to the rear of the car without the interior, While I was removing the
seats I found this. It looks like someone in this car's history took a
Sawzall to this seat bracket. Now I have some welding to do. |
|
|
|
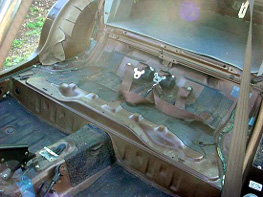
Interior & Flooring |
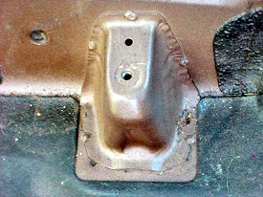 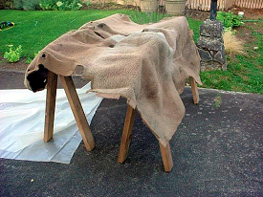 For
comparison, this is what the seat bracket should look like., here is the
carpet drying out on stands For
comparison, this is what the seat bracket should look like., here is the
carpet drying out on stands |
|
|
|
Getting it back together |
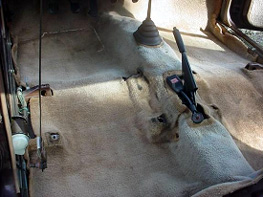  This
is the carpet reinstalled, an outside view with the interior still apart This
is the carpet reinstalled, an outside view with the interior still apart |
|
|
|
Nasties |
|
  Finally,
the interior back together Finally,
the interior back together
My car had a few rust spots on it, so I sanded them down with a Dremel
rotary tool and spray-painted the metal flat black.
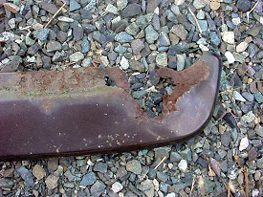
This is the rear bumper cover that came
with the car. Nasty |
|
|
|
Rusties |
|
  This
is the rear bumper cover that I found in a junk yard and painted flat
black. Much better. This
is the rear bumper cover that I found in a junk yard and painted flat
black. Much better.
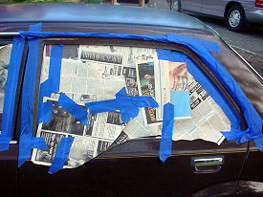
The driver's side rear door frame had a
rust problem, so I taped it up in preparation for sanding and paint.
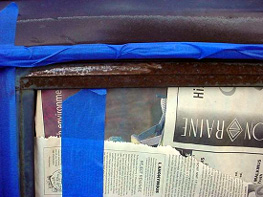
Below left: A close up view. The shiny part
is where I already sanded.
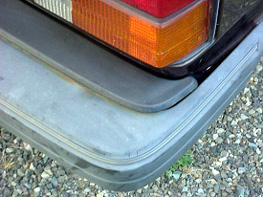
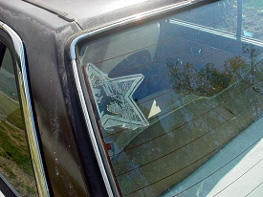
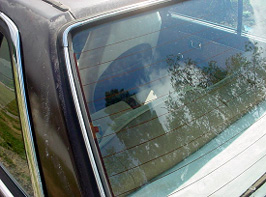
The rear window had the remains of some
sort of sticker. I used a metal spatula and a can of brake cleaner to take
it off. Nice and clean now |
|
|
|
Finished |
   |
|
|

